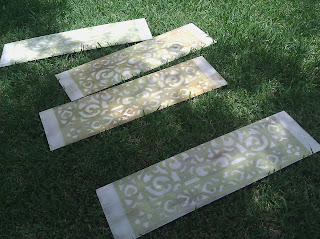
So you want to try it yourself?
First here's what you'll need, I didn't have to buy much because we had a lot of thing laying around the house I could use:
Boards or canvas the size of the mat (each pair is one mat)- When picking your boards pick ones that you can paint against the grain, I think they came out better, they are the two center ones in the above picture.
A background color - I used leftover paint we had here a green and a shade of white
1 paint brush
Spray paint - I used 1 can but it barely covered so I recommend 2, I chose off white
Sandpaper
Polyurethane - this is not mandatory but I used it and am very happy with the results
A door mat - I purchased mine from Lowes for about $19 but there are other places you can buy them. Amazon has several ranging upward from $10
You will also need to figure out how you are going to hang them. Depending on the material you use, you may have to buy hardware.
Start by cutting your boards the size of the mat. At this phase you can cut them in half again but, I chose to do that at the end. For mine, I added 6" to length of the mat, I wanted a 3" border at the top and bottom of the design. You do not have to do that, just go with what you think will work for your space. If you trace around the mat you will get nice straight lines for cutting.
After the boards were cut to size I painted them white. I wanted an older look so I just used a dry brush to paint leaving the wood peeking through in some areas.
 |
| Excuse the bad lighting, it was hot and I was working under the trees. |
Anyway, I used the same dry brush "technique" with the green, leaving some white and some wood showing through. I really wanted an aged, layered look.
 |
| Its hard to see because of the tree above, but you get the idea. |
This part is why I decided to wait to make the last cuts. I thought it would be easier to make sure everything lined up. Some of the comments I read stated that people used a razor blade to make sure all the openings were evenly cut on the mat. I didn't do that because I wasn't looking for a perfect look, I don't think it made a difference anyway.
Now you're ready to bust our the spray paint!
If you are going for a look similar to the one I did. You don't need to be picky or worry with solid coverage. I spray painted some areas thicker than others. I just made sure everything had a coat of paint even if you could see some green or wood through. Do the same on both, or all 4 - if you've already cut the boards in half. I took the mat off pretty much immediately after I painted. I am not a very patient person and with 2 little ones, I don't have time to watch paint dry. Plus its so hot here it took the spray paint no time to dry. They did fine, just be careful not to smudge the paint as you lift the mat off. I did go back at this point and sand any areas I thought needed a little "extra wear" but there weren't many.
Once I was sure the paint was dry I turned the boards paint side down and measured the center to make my cuts. If you drag the saw across the painted side you may get black rub marks. Once the final cuts were made I sanded any of the rough edges and but a coat polyurethane over the boards. I mentioned earlier you can leave this step out. I decided to do it because the wood we used was leftover thin paneling type, from a previous project. The edge splinter pretty bad when you cut it and I figured the polyurethane would make for a smoother edge. I was pleasantly surprised because now when they are hanging on my wall the polyurethane really catches the light on the spray painted part and it looks neat.
Anyway set everything aside and let dry
Hang it Up!
Once its dry you can hang them. I used twine to hang mine. The boards were too thin to put any screws or picture hanging hardware on the back without anything poking through the front. Here's how:
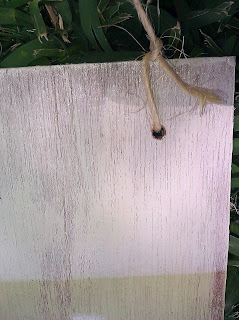
Drill a hole on each side to tie your twine. I put mine 1" down and 1" over.
I measured 4 pieces of twine all the same length. I kind of just did a mock up to determine what I thought was a good length. Then I fed the twine through the back of the board and pulled through 3". Its important to measure how much you pull through so that when you hang them you can make all the nails level and your pieces will be level.
Once the twine was through I carefully tied a knot trying not to pull any more twine through the hole.
It was successful and they were easy to hang. We used tiny hooks that I spray painted then I was spraying the mat.
So here it is, and I am so happy with it. I can't wait to tackle those ugly walls, I am not a fan!
Let me know how what you think. If you try it, have fun with it and send pictures!


They are beautiful!! I SO want to try this now. Thanks for all the tips, they really do look great!
ReplyDelete