background

Tuesday, October 29, 2013

New House Tour - Master Bath

I promised the master bath makeover was pretty significant. In just one weekend for around $1500 I feel like we really upgraded the space. Like in every room, there is still more I'd love to do (see blue cultured marble bathtub) but, the master bath for now gets bumped somewhere toward the bottom.

Here's what we started with

This is actually a picture from MLS when we bought it. A lot of gold and 10 miles, OK 9ft of cultured blue marble vanity with matching bath tub.

Really, a master bathroom make over wasn't very high on our list. We figured it would cost a ton and nobody sees it except us. But one weekend when Chris was out of town I decided a little update wouldn't
hurt...
I purchased a pair of white IKEA curtains for $4.99 and painted stripes on them with regular latex paint that I found as a mis-tint for $5. I carried the stripe to the very back wall in the actual toilet room. I painted the doors black and spray painted the knobs. Found some $6 rugs for in front of the sinks at home goods and painted all the cabinetry with  my mis-tint. Chris has already replaced the sink faucets. I wasn't sure that the jets could easily be replaced so I taped the bathtub off and made holes around the faucet and jets, then sprayed them black with Rustoleum spray paint (farewell everything gold- except those 2 gold knobs I couldn't get off while Chris was out of town.) So far its held up without issue.


(Extra credit if you noticed the previously mentioned gold knobs)

I figured this would do until further notice. However, I didn't realize until too late, the previous paint on the cabinets was oil base. I used latex, this was not good. It chipped and peeled in tiny spots right away. I told myself we would just live with it until it could be fixed. Then we decided to get granite in the kitchen. I figured why not have them put in the master too.  During some shopping research, I realized for the price of granite would could replace the vanity, mirror, and counter top with something pre-made from Lowes or Home Depot. 
After carefully measuring the bottom of the vanity and comparing for hours online I found that we could actually do two smaller vanities and save a little money.  We had to be really careful the base of the new vanity was a little larger than the current base and not one of the open bottom kind, or we would need to replace the whole floor. Being as I was pretty pregnant and we were trying to remain budget friendly, I felt like flooring was a bit ambitious this go round. 
Finally we settled on this with a plain white top from Home Depot.
Let the demolition begin. As I mentioned before I was pregnant at the time so all the heavy lifting had to be done by Chris. Which meant nearly the whole project. 
He started by taking out the counter top. It was long and heavy and hard work. He had to cut it just so it could fit down the hall. Then he got out the base cabinets which proved much easier. Last, we took down the mirror. We knew it would be too heavy and too dangerous for him to try to get down the hall in one piece so we taped it up and broke it in a couple smaller pieces. 
See why I had to be super careful with my measurements...


Isn't that wallpaper a beauty? I was actually surprised to see it, that means that our bathroom had in fact been "updated" at least once before. 

Next we brought in the new vanities and counter tops. Chris reattached all the plumbing and I did some caulking. We called it a night so that we could let everything dry.


The next morning I started working on texturing the wall. I'd never done this but found a super easy tutorial at The Creativity in the Chaos  it worked great and I highly recommend this method. Tip 1: You should probably take down the wallpaper... I was more like "ain't nobody got time for that" and decided to texture over it.  Tip 2: if you are taking down a builder mirror, you should probably do a really great job sanding along the edges of where the mirror used to be. If not, once you texture and paint, you may be able to see the outline of the old mirror in places...Im just lazy and not that picky so I sorta sanded. Also, after the first coat I let it dry and came back in a few places.


While the texture dried we did some mirror shopping. We found them at home goods for only $30 each. They go perfectly.

Finally I got to paint and accessorize...


And a final recap version before and after (middle too if you want to get technical.) 


I'm really happy with the results. The vanities look great, I love the black. And to be perfectly honest, this project was one of the easiest we've done since we moved in. I mean it was a lot of heavy hard work, but there were not many surprises, extra trips to the hardware store, or "why isn't this working" moments. I'm very proud of husband for doing such a nice job.

Now, anyone know a bathtub re-finisher? 


Wednesday, October 23, 2013

The New House Tour -The kitchen

After dragging you through ever excruciating detail of selling our old house it just occurred to me that I haven't posted anything to do with our new house. Thats hardly fair right? Well I am sure you have seen the pictures on facebook but since its out with the old and in with the blog, I figure they should be posted here too.
I only have about a gazillion pictures, a lot of them from my phone so not the best quality but perfectly fine for the purpose of documentation. One thing I learned from being a homeowner with the old house, I LOVE before and after pictures. Its so fun to see how far things have come. But today we'll start with the kitchen, the heart of the home so it seems appropriate. Its not completely done (is it ever?) But its finished enough that it has become a lower priority on the list.

This is what we saw when we came to look at the house. Its impossible to tell from pictures but the kitchen was disgusting. I'm quite certain the base boards and cabinets had never been wiped down and maybe not the stove either. The grout on the tile counter tops made me shutter.


Take notice of the door here, you'll be quizzed on it later!

Luckily, dirt cleans up. Sometimes, it requires more elbow grease than we initially thought, and OK I ended up painting the counter top grout because it was so stained and I couldn't look at it anymore, but it cleaned up.
We also had the kitchen painted a lighter shade of green, I was going for pistachio but ended up with mint. At least it was fresh and I can change it at a later date, Im sure pistachio or not, it would eventually get changed again anyway.


What do you think of the black doors? I love them.


I tried to live with it, I really did. I cleaned and cleaned. I added beadboard wallpaper to the cabinet ends for a little something extra, I got new knobs and pulls, and we got a really pretty new faucet.
But after months of complaining about the tile counter tops calmly mentioning how I felt that grout on counter tops was a bacteria breeding ground and getting a surprisingly reasonable estimate on granite, I had Hubbs on board new counter tops (a new sink, and another new faucet) and I took advantage!

In the meantime, I took it upon myself to get rid of the nasty old fluorescent above the sink and add a pretty pendant. Oh the surprises he gets while he's at work


Bye bye tile!
One of the favorite things I did was have them level the bar out behind the cook top. It used to be elevated to bar height but I asked them to make it all counter height. I felt like with the vent hood hanging down and the bar rising up, it was just closing everything in. The results made it look much bigger. 

Hello shiny black granite! I also had Sherwin Williams match a cabinet door so I could touch up all the cabinets and paint the beadboard wallpaper. Last I trimmed out the cabinet ends to look a little fancier. 

Look close and you can see the wallpaper Im talking about here.

Off to the left, the black door again...


Well the picture is too bright to see my replacement light above the sink, but its there. 


So here is a little before and after recap for ya!


You can really see what I am talking about with the bar/cook top in the photo.


Since the counter tops were finished we've done away with the eat in kitchen area and put in a large hutch to absorb some storage from the laundry room (I knocked out some cabinets to make a "mudroom" - that's another post.)  I'm also on the hunt for some cute bar stools so the kids can be there to "help" while Im cooking supper. Eventually, the floor tiles will be replaced along with the cabinet doors and vent hood, a more neutral paint color will go up, and the rest of the lighting will be updated, but for now I'm still in awe when I walk in and see my granite so the kitchen gets bumped to the bottom of the list. Just wait until the master bathroom post.

Pop quiz...what did you think of the black door? I did all of them in the house, Ill have to see if I can rustle up some before and after shots but I really like the difference it makes. 


Tuesday, October 22, 2013

Scarecrow fit for a Parade

I've just about had it up to my eyeballs with the October festivities going on at Emma's school. I LOVE crafting but each day they bring home something else that has to be done, made, or worn.
Today, they go to the library and pick out a book for a book character pumpkin contest. Each child (and family) makes a pumpkin from a book (from the library -so parents wont have much say in this) and brings it to display next week. In the meantime, this Friday is a scarecrow parade. I knew I needed to make a costume for it but it also needed to be something comfortable enough Emma would wear it all day. Scratchy straw poking out of her sleeves and pant legs wasn't going to cut it.
Before we get too far I have to warn you, this may be more of an idea than a tutorial. It involves some sewing and my knowledge of sewing is far too minimal to try to walk you through it. But if you already know how or you are willing to search some you tube videos, you will be just fine.
I found this picture on pinterest and decided to go for something similar. I mean these are pretty adorable.

My first stop was the thrift store. I was sure I could find overalls there and could work it out from that. No luck. I snagged a cute top and pair of cheap "jeggings" just in case (Emma refuses to wear jeans) and went to one ore thrift store. I still did not have luck so I decided it was time for a new plan, the jeggings were it.
So equipped with 
-1 pair of jeggings, use jeans if you can, its easier to sew
-1 tee shirt
-1 yard of Halloween fabric (probably only need a half but I didn't trust myself not to make a mistake)
-1 package of Velcro (at least 24") - I got the iron on kind.
-1 package of raffia
- wonder under 
- ribbon
-coordinating scrap fabric
- glue gun, sewing machine, and thread


I decided in order to make this work for an all day outfit, the straw was going to have to be removable. Enter velcro. First I cut lengths of velcro to fit the front and back of each pant leg. I ironed the soft side to the pant and glued the raffia to the plastic-y side. Voila, removable straw. 


Next I decided just how long I was going to make the ruffle to hide the velcro. I love those ruffle-y pant legs, so the bigger the better in my opinion.  My ruffle was about 8". 


This is where the sewing machine is required. However, if you are using overalls or non-stretchy denim, you may be able to get away hot gluing the whole thing together. I attempted this first but ended up taking it apart and starting from scratch. 
I left the width of the fabric how it came on the bolt. I hemmed the bottom and each edge to keep from fraying. Then I used the machine to sew a lose stitch and hand pulled the ruffle. 
In order to attach it to the jeggings I had to cut up the inseam of the pant to the just below the height of the ruffle. Once the ruffle is attached sew the inseam back together. You can embellish with ribbon. 
I did the same thing on the shirt sleeves except I cut the sleeve completely off instead of sewing it back together. I wasn't planning on putting any "straw" in the sleeves otherwise I would have done it the way I did the pants (so it wouldn't be itchy.)
I used the remainder of my fabric and some of the scraps to attach patches to the pants and shirt sleeve. I just attached them with the wonder under and didn't sew around them. I figured if they frayed it would be fine for a scarecrow look. We already had some Halloween hair clips that match just fine (thats whats pictured on the shirt below, its kind of hard to see) so I'm not making any but you totally could and add raffia to those too. In my opinion she'll be a pretty cute scarecrow and once the straw is taken off its still a great Halloween outfit. 


Snapped this on my phone when she tried it on...yep, pretty cute!


Monday, October 21, 2013

I Wanna be Rainbow Fish - a costume DIY

This weekend the hubbs was very kind and gave me most of the day Saturday to myself. He took the kids to some festivals with some friends and then back to their house to watch A&M play. If you know me at all  you probably know that football season is my least favorite thing about fall.
Anyway I decided to take advantage of the time and make the costumes for the kids. I was afraid that I'd go into labor and they wouldn't have anything to wear. Otherwise, who are we kidding, I would have procrastinated until next weekend then scrambled around trying to throw something together. In addition to Halloween, Emma has a book character parade, a scarecrow parade, and they are both in a wedding ALL this month. Thats a lot of costumes right? So today I'll start with Eli's.  After a sting of things he wanted to be he has decided to be Rainbow Fish, you know, from that book?


First I was like "Really? I know some people really like this book but we've only read it a couple of times." I figured they must have read it at school recently because honestly it was a weird request. The more I thought about it though, I decided "two birds, one stone..." Emma has that book character parade I mentioned earlier. It might take some convincing but maybe she'll go for it (if not she can always be one of the 50 million princess.) 
Enter pinterest, its so nice not to have to go to the effort of having an original thought ever. 
I did some looking and found this adorable Nemo costume, DIY included, by Maggie over on her Mighty Girl blog. I was quite certain with a few tweaks this would was the perfect model. 


I started by looking for a blue hoodie at the thrift store. No such luck. But I did score Eli's whole outfit for the wedding for less than $10 and Emma's basic scarecrow outfit. I was tempted to head to the fabric store and round up the felt but decided to go to Walmart first and make sure I could find a blue hoodie, or there was going to have to be a change of plans.  I hate shopping there but, sometimes you can't beat a good deal and for $3.88 I found the blue hoodie (it had a design on the front but I knew I was going to cover it anyway.) 
Let me go full disclosure right here, this is a long tutorial and picture heavy so if you are just here to look at the finished project skip on down to the end.  

There was a pretty good list of materials on the Mighty Girl blog so I just took a picture of my pile of materials so that you could check out what I had. It was my experience that for a 3T, I got a way with maybe 15-20 pieces of felt instead of 30, I used 3 different colors of blue. 
Don't forget the TV remote, it takes a while to cut all the circles!


Not pictured or maybe not used on the other blog is:
-spray adhesive
-2 pieces of stiff felt (for the crown) 
-the small clay pot bottom thing (I used this for tracing scales instead of a can. It was left over from another project and has come in handy many times.) 
-1 piece each of black felt and white felt (for the eyes,) and a light blue (for the shiny scales)
-the glitter FLAKES (for the shiny scales) 

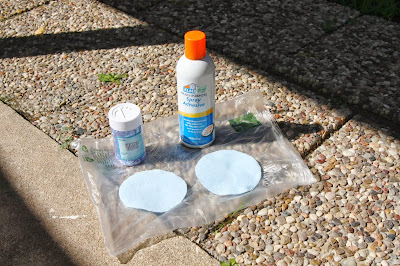
Start by trace 4 circles onto the light blue felt. Take them outside (this stuff is really sticky and really smelly) and spray them with the glue then sprinkle on your glitter flakes. I dumped the excess glitter back in the shaker- never know when  you need more glitter flakes- then set them somewhere to dry. I started here to make sure they were completely dry when I was ready to attach them.


Now you are ready to start tracing and cutting the blue felt circles. I got 4 circles to each piece of felt. I found that I could layer 2 pieces just fine and really up to 4 when I was feeling tired and impatient.  MAKE SURE to leave 2 pieces out for the tail.


I used the two pieces I set aside to cut and assemble the tail. I drew it out with marker first.


Next I did the eyes. I cut 2 circles on white the same size as the scales. Then I cut down 2 of my blue circles to be a little smaller and 2 black circles a little smaller than that.  Finally, I cut two white shapes out that I can only describe as "comma shaped." Then I glued them together, white, blue, black, then your commas. (see picture) 
I also cut out the fin for the hood of the costume. This is where you use your stiff felt.  I did this part a lot different than the Nemo fish example. Rainbow Fish has a much different shape.  I just looked at a picture of the fish and did the best I could. I drew the design on one piece, with the marker until I had what I wanted. Leave about an extra inch on the bottom for attaching to the hood. It helped to lay the hood on the felt and trace the shape of the top of the hood. (Wow I really should have taken more pictures here)  I layered my two pieces and cut the shape then turned the marker side in and glued them together (all but the extra inch on the bottom.) Then I folded the outward so that if you were to lay the seam where the two pieces meet, flat on the table, the fin stands up.  
Finally, it was ready for assembly. This it basically what I had (plus the hoodie)


I started by gluing the tail to the back part of the hoodie. I just glued it along the band that was already there (you can see where I laid it out on the pictures above.)
I glues the fin to the top, each inch wide piece to either side of the seam on the top of the hoodie. Then glued my eyes on. I put the comma shape toward the front (see below)
Then I flipped it to the front because I wanted to make sure I had enough scales to cover the design (there was WAY more than enough.) I laid out each row alternating colors. I wanted the scales to cover the zipper so I applied the glue to the hoodie instead of the felt that way I didn't accidentally glue the zipper together. I started at the shoulder and since you are layering them I started with just one line of glue across the top. I filled in and glued down as needed. I was also careful not to glue my pockets down, we all need extra candy storage! I only used one of the 3 shiny scales on the front


Finally I flipped it over and did the back layering and alternating colors. I used the last 3 shiny scales randomly on the back as well.  I was pretty impressed with my handy work in the end. I would have hung it on a hanger for the picture but I felt like you needed the full effect of the top fin too. I did not do the sleeves but I had more than enough if you wanted to you could. 


You can kind of get a better idea of the eyes and the top fin in this one.


I can't wait to reveal pictures of him in this, it is pretty adorable. Tomorrow I'll add a quick scarecrow tutorial, although I know all my crafty readers are more than able to come up with their own scarecrow idea.