background

Showing posts with label Feeling Crafty. Show all posts

Wednesday, April 30, 2014

A Backyard Hangout

Doesn't this time of year just make you want to spend every moment outside? It does for me and now that we finally have our lives back from the wicked allergies this year threw at us, I intend to get some fresh are and sunshine.
Last winter we got rid of our kid's Little Tikes house in favor of my new garden.  They'd just outgrown it even though they still liked playing in it. But my garden really is cool and I'm obsessed with it and composting.


After pinteresting tons of ideas...
like the pallet playhouse
this is not my child so I felt she should remain anonymous 
or this great treeless tree house

I could just see a cracked skull from falling of the top or swinging into the house
I decided that maybe I needed something simpler, maybe less permanent and lets be honest, cheaper.
So I turned to Ana White and found the $20 tent. It literally took  $4 worth of screws, I already had enough 2x2x8 boards and a couple of old sheets. Score! 
I worked on it for about 3 hours this morning and here is what I came up with 


The tent "door" can be open 

or closed for a little more shade


you can see it closed a little better from this angle.

I gave it a few touches like a solar lantern, every camp needs a lantern right?

And pinwheels from their Easter baskets, which have had aprx. 10 homes since Easter. 

It really is a hit, he is one happy "camper!"


Ok for my mods off Ana White's plan...
I used 8ft pieces of lumber, its what I had and I wanted as few cuts as possible. You should just stick to her plan, those 2x2's were a beast to work with. 
As for the fabric, I used a king sheet and a twin sheet.  I sewed them together end to end and made the corners line up in the back. Does that make sense? 
then I just draped them over the top along my stitch and tucked them in at the bottom and around the sides. The king sheet allowed for a bit of a door.  I didn't want to attach it because I wanted it to be super easy to take off and on so that I didn't kill the grass leaving it covered all summer. 
Also I plan on using at as a greenhouse over my garden this winter and just wrapping it in plastic. We have a small yard, multi-functional is a plus.
Insert greenhouse tent over top and the perfect place for my hanging baskets to weather the winter. 
Ok so thats it, it really is simple guys. Make one and feel free to ask if you have any questions. 


Saturday, December 7, 2013

Teacher Gifts

This year I've been debating on teacher gifts. I hate to give them something they probably have already received a thousand times, I don't know enough about them to pick something personal, and they can probably decorate their entire tree in gifted ornaments alone. Plus, its Christmas and like everyone else, I have a budget.
Finally, I came across this cute idea on Pinterest to give giftwrap (maybe my blog should be called Pinterest adventures.) At first I saw it and thought, thats pretty lame but I followed the link to to a blog called It's Always Craft Time and read more.  So the giftwrap comes with tape and a little card (you can print a couple cute ones free from Always Craft Time) that reads...


Since November you've been shopping,
Barely sleeping, hardly stopping. 
Now its late, you're in a scrape, out of paper or out of tape.
Hope this wrap saves the day! 
Merry Christmas

)

Since our printer is not a color printer I had to make my own card. While I was at Hobby Lobby getting the gift wrap I picked up two coordinating Christmas scrapbook pages then a matching transparent one to each. I bought the smaller size paper, it went through the printer no problem and I was able to make two cards per sheet. 
I just printed the saying on the transparent paper and layered it over the decorative one. I punched two holes in each so it would lay nicer once it was all tied together. 


All and all not bad for a cute, useful, budget friendly teacher gift. The kids even got to have a hand in it because they picked out the paper. Hey, if the teachers don't like it they can always re-gift it and at least its not another ornament with an apple on it.
Happy gifting!

Tuesday, October 22, 2013

Scarecrow fit for a Parade

I've just about had it up to my eyeballs with the October festivities going on at Emma's school. I LOVE crafting but each day they bring home something else that has to be done, made, or worn.
Today, they go to the library and pick out a book for a book character pumpkin contest. Each child (and family) makes a pumpkin from a book (from the library -so parents wont have much say in this) and brings it to display next week. In the meantime, this Friday is a scarecrow parade. I knew I needed to make a costume for it but it also needed to be something comfortable enough Emma would wear it all day. Scratchy straw poking out of her sleeves and pant legs wasn't going to cut it.
Before we get too far I have to warn you, this may be more of an idea than a tutorial. It involves some sewing and my knowledge of sewing is far too minimal to try to walk you through it. But if you already know how or you are willing to search some you tube videos, you will be just fine.
I found this picture on pinterest and decided to go for something similar. I mean these are pretty adorable.

My first stop was the thrift store. I was sure I could find overalls there and could work it out from that. No luck. I snagged a cute top and pair of cheap "jeggings" just in case (Emma refuses to wear jeans) and went to one ore thrift store. I still did not have luck so I decided it was time for a new plan, the jeggings were it.
So equipped with 
-1 pair of jeggings, use jeans if you can, its easier to sew
-1 tee shirt
-1 yard of Halloween fabric (probably only need a half but I didn't trust myself not to make a mistake)
-1 package of Velcro (at least 24") - I got the iron on kind.
-1 package of raffia
- wonder under 
- ribbon
-coordinating scrap fabric
- glue gun, sewing machine, and thread


I decided in order to make this work for an all day outfit, the straw was going to have to be removable. Enter velcro. First I cut lengths of velcro to fit the front and back of each pant leg. I ironed the soft side to the pant and glued the raffia to the plastic-y side. Voila, removable straw. 


Next I decided just how long I was going to make the ruffle to hide the velcro. I love those ruffle-y pant legs, so the bigger the better in my opinion.  My ruffle was about 8". 


This is where the sewing machine is required. However, if you are using overalls or non-stretchy denim, you may be able to get away hot gluing the whole thing together. I attempted this first but ended up taking it apart and starting from scratch. 
I left the width of the fabric how it came on the bolt. I hemmed the bottom and each edge to keep from fraying. Then I used the machine to sew a lose stitch and hand pulled the ruffle. 
In order to attach it to the jeggings I had to cut up the inseam of the pant to the just below the height of the ruffle. Once the ruffle is attached sew the inseam back together. You can embellish with ribbon. 
I did the same thing on the shirt sleeves except I cut the sleeve completely off instead of sewing it back together. I wasn't planning on putting any "straw" in the sleeves otherwise I would have done it the way I did the pants (so it wouldn't be itchy.)
I used the remainder of my fabric and some of the scraps to attach patches to the pants and shirt sleeve. I just attached them with the wonder under and didn't sew around them. I figured if they frayed it would be fine for a scarecrow look. We already had some Halloween hair clips that match just fine (thats whats pictured on the shirt below, its kind of hard to see) so I'm not making any but you totally could and add raffia to those too. In my opinion she'll be a pretty cute scarecrow and once the straw is taken off its still a great Halloween outfit. 


Snapped this on my phone when she tried it on...yep, pretty cute!


Monday, October 21, 2013

I Wanna be Rainbow Fish - a costume DIY

This weekend the hubbs was very kind and gave me most of the day Saturday to myself. He took the kids to some festivals with some friends and then back to their house to watch A&M play. If you know me at all  you probably know that football season is my least favorite thing about fall.
Anyway I decided to take advantage of the time and make the costumes for the kids. I was afraid that I'd go into labor and they wouldn't have anything to wear. Otherwise, who are we kidding, I would have procrastinated until next weekend then scrambled around trying to throw something together. In addition to Halloween, Emma has a book character parade, a scarecrow parade, and they are both in a wedding ALL this month. Thats a lot of costumes right? So today I'll start with Eli's.  After a sting of things he wanted to be he has decided to be Rainbow Fish, you know, from that book?


First I was like "Really? I know some people really like this book but we've only read it a couple of times." I figured they must have read it at school recently because honestly it was a weird request. The more I thought about it though, I decided "two birds, one stone..." Emma has that book character parade I mentioned earlier. It might take some convincing but maybe she'll go for it (if not she can always be one of the 50 million princess.) 
Enter pinterest, its so nice not to have to go to the effort of having an original thought ever. 
I did some looking and found this adorable Nemo costume, DIY included, by Maggie over on her Mighty Girl blog. I was quite certain with a few tweaks this would was the perfect model. 


I started by looking for a blue hoodie at the thrift store. No such luck. But I did score Eli's whole outfit for the wedding for less than $10 and Emma's basic scarecrow outfit. I was tempted to head to the fabric store and round up the felt but decided to go to Walmart first and make sure I could find a blue hoodie, or there was going to have to be a change of plans.  I hate shopping there but, sometimes you can't beat a good deal and for $3.88 I found the blue hoodie (it had a design on the front but I knew I was going to cover it anyway.) 
Let me go full disclosure right here, this is a long tutorial and picture heavy so if you are just here to look at the finished project skip on down to the end.  

There was a pretty good list of materials on the Mighty Girl blog so I just took a picture of my pile of materials so that you could check out what I had. It was my experience that for a 3T, I got a way with maybe 15-20 pieces of felt instead of 30, I used 3 different colors of blue. 
Don't forget the TV remote, it takes a while to cut all the circles!


Not pictured or maybe not used on the other blog is:
-spray adhesive
-2 pieces of stiff felt (for the crown) 
-the small clay pot bottom thing (I used this for tracing scales instead of a can. It was left over from another project and has come in handy many times.) 
-1 piece each of black felt and white felt (for the eyes,) and a light blue (for the shiny scales)
-the glitter FLAKES (for the shiny scales) 

Start by trace 4 circles onto the light blue felt. Take them outside (this stuff is really sticky and really smelly) and spray them with the glue then sprinkle on your glitter flakes. I dumped the excess glitter back in the shaker- never know when  you need more glitter flakes- then set them somewhere to dry. I started here to make sure they were completely dry when I was ready to attach them.


Now you are ready to start tracing and cutting the blue felt circles. I got 4 circles to each piece of felt. I found that I could layer 2 pieces just fine and really up to 4 when I was feeling tired and impatient.  MAKE SURE to leave 2 pieces out for the tail.


I used the two pieces I set aside to cut and assemble the tail. I drew it out with marker first.


Next I did the eyes. I cut 2 circles on white the same size as the scales. Then I cut down 2 of my blue circles to be a little smaller and 2 black circles a little smaller than that.  Finally, I cut two white shapes out that I can only describe as "comma shaped." Then I glued them together, white, blue, black, then your commas. (see picture) 
I also cut out the fin for the hood of the costume. This is where you use your stiff felt.  I did this part a lot different than the Nemo fish example. Rainbow Fish has a much different shape.  I just looked at a picture of the fish and did the best I could. I drew the design on one piece, with the marker until I had what I wanted. Leave about an extra inch on the bottom for attaching to the hood. It helped to lay the hood on the felt and trace the shape of the top of the hood. (Wow I really should have taken more pictures here)  I layered my two pieces and cut the shape then turned the marker side in and glued them together (all but the extra inch on the bottom.) Then I folded the outward so that if you were to lay the seam where the two pieces meet, flat on the table, the fin stands up.  
Finally, it was ready for assembly. This it basically what I had (plus the hoodie)


I started by gluing the tail to the back part of the hoodie. I just glued it along the band that was already there (you can see where I laid it out on the pictures above.)
I glues the fin to the top, each inch wide piece to either side of the seam on the top of the hoodie. Then glued my eyes on. I put the comma shape toward the front (see below)
Then I flipped it to the front because I wanted to make sure I had enough scales to cover the design (there was WAY more than enough.) I laid out each row alternating colors. I wanted the scales to cover the zipper so I applied the glue to the hoodie instead of the felt that way I didn't accidentally glue the zipper together. I started at the shoulder and since you are layering them I started with just one line of glue across the top. I filled in and glued down as needed. I was also careful not to glue my pockets down, we all need extra candy storage! I only used one of the 3 shiny scales on the front


Finally I flipped it over and did the back layering and alternating colors. I used the last 3 shiny scales randomly on the back as well.  I was pretty impressed with my handy work in the end. I would have hung it on a hanger for the picture but I felt like you needed the full effect of the top fin too. I did not do the sleeves but I had more than enough if you wanted to you could. 


You can kind of get a better idea of the eyes and the top fin in this one.


I can't wait to reveal pictures of him in this, it is pretty adorable. Tomorrow I'll add a quick scarecrow tutorial, although I know all my crafty readers are more than able to come up with their own scarecrow idea. 


Thursday, June 9, 2011

Summer kid friendly craft - #1

Custom T-shirt - ages 3 and up (maybe 2ish with spray help)
**disclaimer - Emma was anxious once I told her we were doing a craft so I didn't take the time to get out my camera and just used my phone. Looking at the pictures now, I may should have reconsidered that decision but, you get the idea. **

What you need:
Solid color T-shirt to fit your child (I just used one Emma had in the closet already)
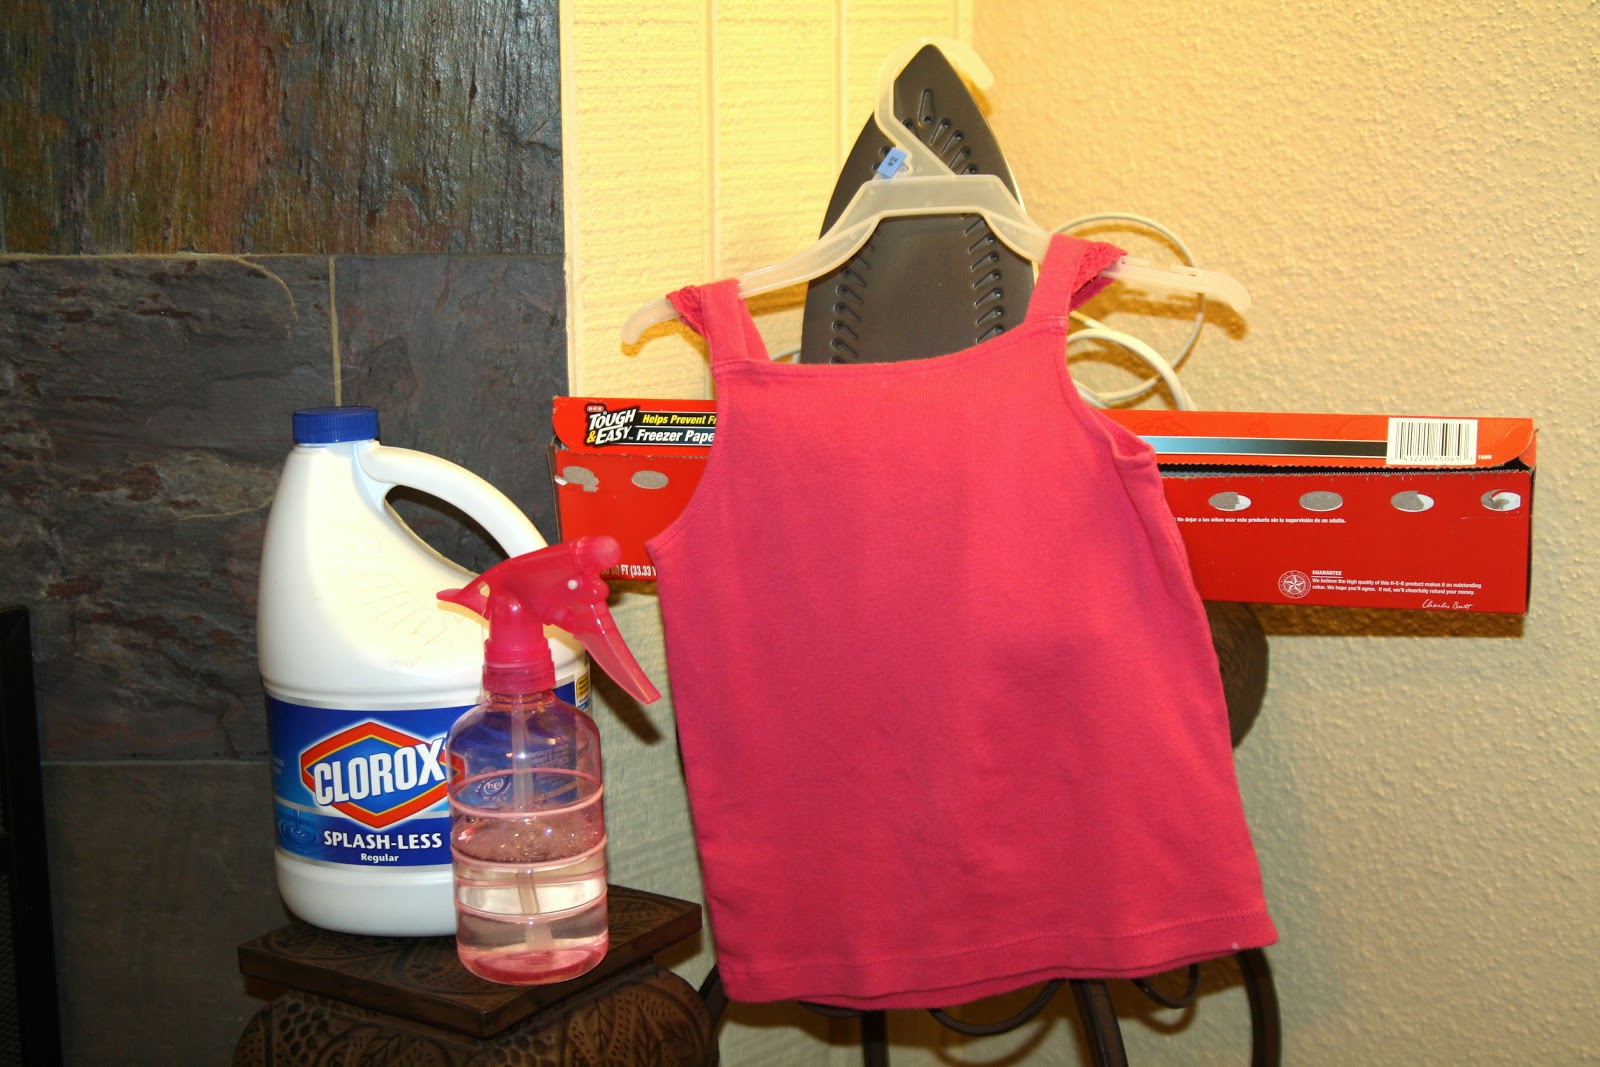
Spray bottle with bleach/water combo (I used half and half, you can also use a squirt gun but I didnt have one handy)
Freezer paper
Cardboard or newspaper to keep the bleach from bleeding through 


Ok first create a stencil design for the shirt. Draw the design onto the freezer paper and cut it out.  I picked a heart because it was easiest on Emmas tiny Tee. The blog I got this idea from did the child's initial...


http://ashleyannphotography.com/blog/2010/06/11/summer-fun-custom-bleached-shirt/

Iron the freezer paper stencil onto the shirt (shiny side down.)


Now you are ready to take it outside and spray it.  Use the card board or newspaper inside the shirt (I skipped that phase and it was fine) and hang it up at the child's level.   You can string a line, I just used the fence, but its short enough for Emma to still reach.


Let the kids have at it with the spray bottle or squirt gun then hang in the sun to dry (today it took like 10min tops and it was done)

Peel the stencil off...voila!


Friday, December 3, 2010

A Christmas Craft

So here it is, the little Nativity Scene Emma and I made today.  She will be giving it as a gift this year.  It was pretty fun and a cute easy project.   The bodies are made of small clay pots and the heads are wooden knobs.  Baby Jesus is made from some wooden pieces I found near the knobs.  I've also seen people just use a smaller wooden knob.  Give it a shots, its a good kid craft.  You may have to help them with the glue if you use hot glue. I let Emma do all the painting (except the eyes) and help with gluing it all together.

Monday, November 8, 2010

Ribbon Turkey Shirts

Ok so the is the closest to a "how to" I can get for these turkeys. I hope it helps.


What you need:
The tee shirt or onsie
1 piece of  brown felt (that should do about 4 Turkeys this size, you can use a different color or fabric)
a piece of paper or cardboard for your pattern
pen or pencil
scissors
a lighter to burn the edges of the ribbon, I think you can use clear nail polish if you'd rather
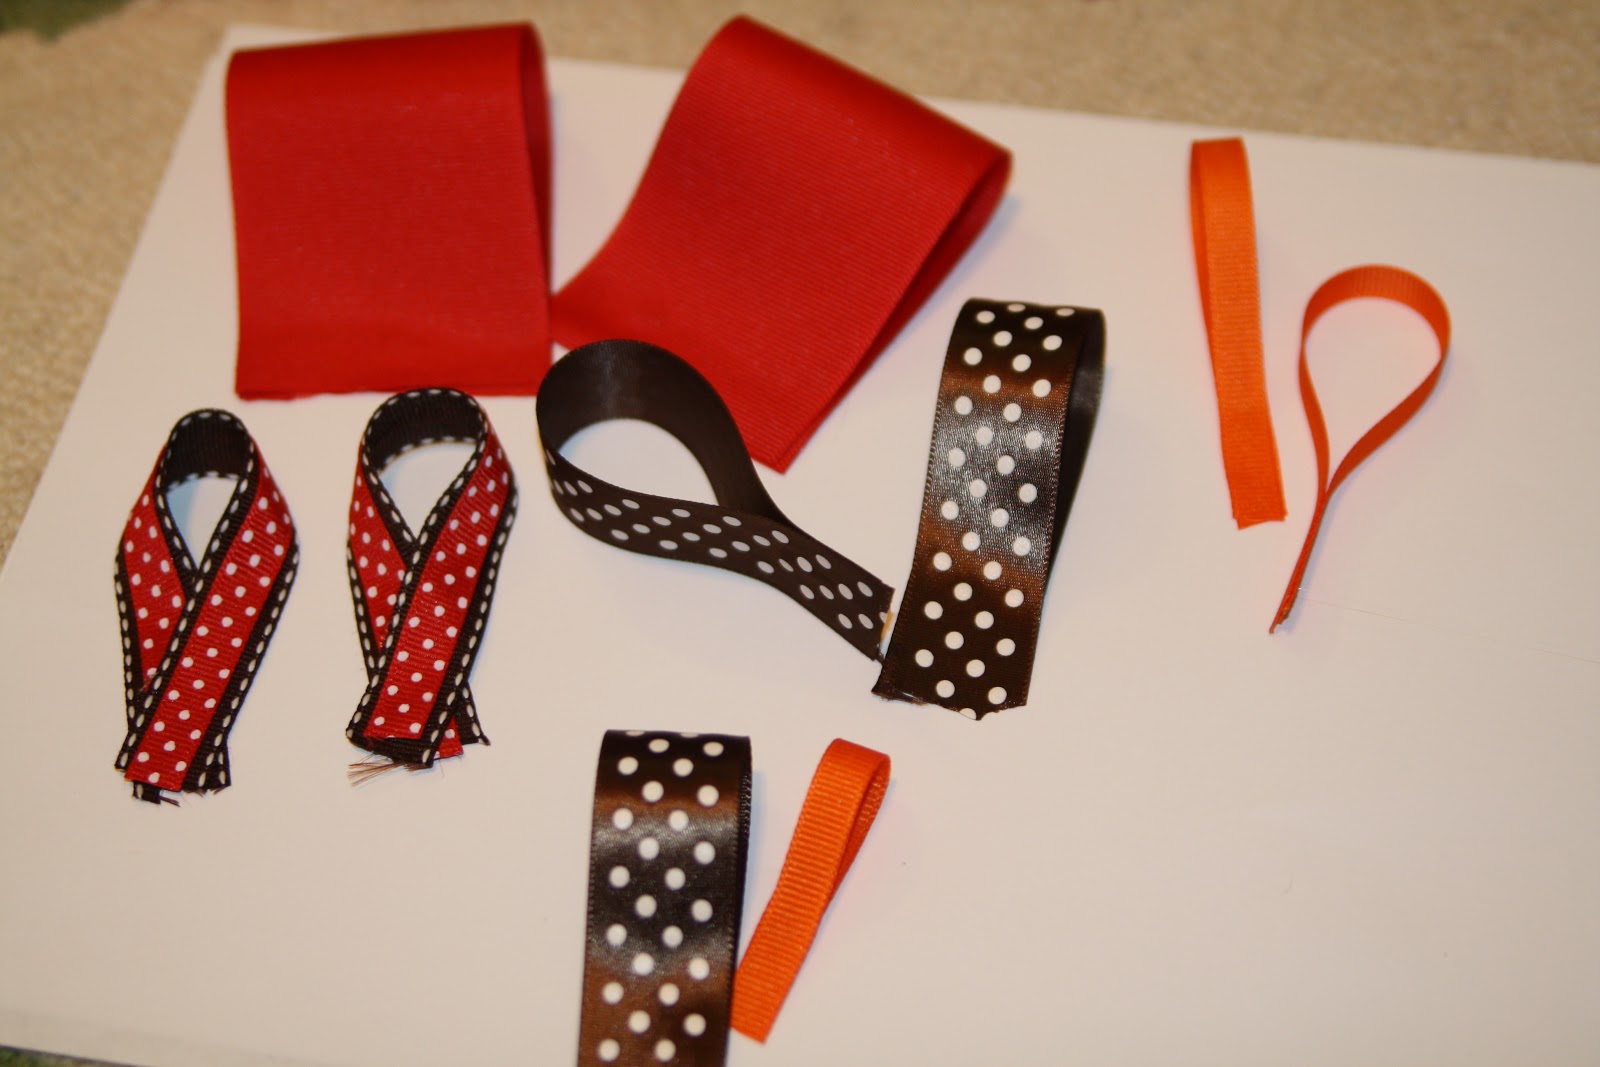
5 colors of ribbon I used:
  • wide grosgrain in red
  • small grosgrain in orange
  • a med grosgrain in brown with white dashes up the side
  • a med brown (satin type) with white dots
  • a small red (satin type) with white dots
Brown thread (or a color to match the felt you picked) and/or applique adhesive (spray or iron on)
If you want your turkey to have eyes, look for some tiny buttons
A hot glue gun
If you want the matching hair bow you will need and alligator clip or I use a snap clip

First  draw your pattern for the body on the paper/cardboard.  It is really just one large and one small circle.  You can play with the shape and the overlap until you get the shape you want. Cut out the pattern. If you are using iron adhesive go ahead and trace and cut your pattern on to the adhesive too (follow the instructions on the package for tracing, do not attach adhesive yet just set it aside when cut) You can trim it up and straighten it out a bit as you go.  You'll notice my felt is quite a bit different then my pattern.
 

For the beak I just cut the orange ribbon at an angle and burned the edges so it didn't fray. Then, I attached it with the adhesive (use the instructions on the package)

Cut the ribbons all the ribbons first. I used aprx 5"... thick red, small orange, med brown polka dot,  med brown with dashes, and small red polka dot (2 each)
  • You can make yours bigger or smaller based on the size of  turkey body and shirt.
  • If you are doing a boy shirt and want the feathers flat, use half that length.
  • Finally on Eli's shirt, the turkey had a hat, you can do yours that way (see pic and make sure to burn the edges so it doesn't fray) or  one more set of feathers for the top.  I used about 4" of the brown polka dot and 3 to 31/2 of the orange.

Girls: Glue your red polka dot to the brown with dashes.  Use a thin line of glue the length of the ribbon.

Loop these two like an awareness ribbon.

Now loop each of the rest of the ribbons over lining up the ends.  Use a thin line about 1/2" to 1" to hold the ribbon in place.

Boys: you will skip all the looping but you will still need to do the layering
Layer the pair of orange ribbons over the red and glue to the center.  Do the same on the shorter brown polka dot and the shorter orange

Set the body on the shirt (I did a hand towel this time) and set out the arrangement of the feathers (see pic)  Tip, I found it easiest to start with the wide red.
Once you have them how you like them lift up the body and apply glue, then replace the body. (Almost done!)


Now if you cut out the adhesive to match your body pattern earlier, this is where you use it.  Flip the turkey over (wrong side up) and put the adhesive on the back.  Peel off the other sticky side and put the turkey in place.  Iron it on!  (I try not to get the iron on the ribbon too much, I don't know if it will do anything) Once the adhesive stick a little I flipped the shirt inside out and really ironed it on. (note: this did not work so well on the hand towel.  I just reinforced with glue)


Oh, if you added eyes, glue them or sew them on.  If you were sewing, I used a zig zag stitch around the Turkey's body on my shirts.

Now, you can take it and have it monogrammed if you want!


Hair Bow:
I am using different colors in the sample because I already made a Thanksgiving bow.

If you want a layered look you will need about 18" of each color.  (Burn edges) I would cut it and glue it down the center like we did the red polka dots above. Try to keep the glue thin so its still easy to work with.


Make your 1st fold and dot with glue to hold in place. I folded over about 2" you can try going through the steps once or twice w/o glue so you can kind of figure it out. 
 
Fold over again and dot with glue.  Try to keep your glue dots all on top of each other in the center.
 Pull the ribbon around the back

Fold and glue over the front. 
 Glue a thinner piece of ribbon (or fold one of the thicker in half) right to the center. This will be about 6 inches long, burn the ends.

Wrap it tightly around the center and glue the end in place. Slide the clip in or glue it to the back.
 Flip the bow over and voila!

    
Post your pics if you tackle this! Good luck